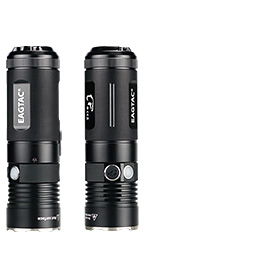
Dimensions
- Head Dia.
- 1.85 inches (47 mm)
- Body Dia.
- 1.8 inches (45.5 mm)
- Length:
- 6.2 inches (159 mm)
- Weight
- 14.8 ounces (420 grams)1

Battery Type
- EAGTAC 11.1V li-ion rechargeable (3x18650) battery pack2
- Read precaution with li-ion batteries.
Operating voltage
- 8.1V - 12.6V
What's included
- SX30L3-R Pro flashlight
- Crenulated stainless steel bezel
- EAGTAC 11.1V li-ion 3x18650 3500mAh 38.8Wh battery pack (authentic Sanyo Japan cells)
- EAGTAC 12V car charger
(voltage step-up circuit built-in) - Add-on diffuser filter with flip-cover feature
- Heavy duty nylon holster
- Spare o-rings
- User Manual
- Mil-Spec Para-cord Lanyard w/ quick attachment clip
- EAGTAC rechargeable battery included
- 100V-240V to 15V@0.8A wall charger
- (US only) UL certified/listed, PSE certified/listed
- (EURO) TUV/CE certified/listed
Carrying method
- Para-cord lanyard with quick attachment clip
- Heavy duty nylon holster
Waterproof
- IPX-8 standard
Replaceable items
- Lens
Reflector
- Aluminum reflector in smooth coating
Material
- HAIII hard anodization aerospace aluminum
LED
- CREE XHP70.2 P2 Cool White LED
- CREE XHP70.2 Nuetral White LED

Max output
- CREE XHP70.2 P2 Cool White LED
- LED lumen: 4850
- ANSI FL-14 lumen: 4100
Beam Profile
CREE XHP70.2 P2 Cool White LED- Center lux: 32,500 lux
- Center spot angle: x°
- Spill light angle: x°
- Beam distance: 393 yards / 361 meters
Lens
- Waterwhite glass lens w/ harden treatment
- Multi-layers low color distortation anti-reflective (A.R.) coating on both side (98% transparency) to prevent reflections and color shadow
LED circuit
- C6600 SC
- Current regulated synchronous buck driver w/ efficiency of up to 96%
- Active thermal management feature5
- Non-dimming constant current regulation for all output levels without flicking
- Smart battery level report system
- High switching frequency controller for more compact circuitry design
- Very low standby current (negligible)
Charging circuit
- C900 SW II
- Highly efficient step-down charging IC
- 15V DC input, 12Watts charging output
- Also charges with EAGTAC 12V car charger w/ step-up circuit built-in (optional, kit model only)
- Reliable constant current and constant voltage charging method
- Fast charge to 55% in two hour
- Very high charging voltage accuracy (1%)
- Small current charge for low voltage battery
- No trickle charge when battery is full
Battery level report (discharging)
- A blue LED indicator under the main switch reports the estimated battery remaining capacity
- Flash once: lower than 20%
- Flash 3 times: 20%-50%
- Flash 3 times: 50%-80%
- Flash 4 times: higher than 80%8
Charging level report (charging)
- A blue LED indicator under the main switch reports current charging level
- Flash once: lower than 50%
- Flash twice: 50%-75%
- Flash 3 times: >75%
- Constant on: 100% (done)
Output and Runtime
- Five brightness levels
- Led lumen:
48505-3265/2470/925/360/54 - ANSI FL-1 lumen:
41005-2802/2135/802/315/47 - Runtime: 1.1-2.2/3.6/13/40/160 hours (38.8Wh battery) 6
- Active thermal output management (68%-100%)
- Three hidden auxiliary outputs7
- Disorienting Strobe/Beacon (1.67Hz)/S.O.S.
0.8-1.6/2.5/9.3/28/120 hours (27.7Wh battery)
Operations
Basic operations:- Turn on the light at MAX output by pressing the BLACK button switch. Turn on the light at LOWEST output by pressing the WHITE button switch
- To turn off the light anytime, press and release the BLACK button switch.
- For MAX output momentary on, press and hold the BLACK button switch for immediate output.
- To switch between different brightness levels, press and release the WHITE button switch when the flashligh is on.
- To enter hidden auxiliary levels, press and hold the WHITE button switch when the flashligh is on.
- For instant MAX output - at any output level, press and hold the BLACK button switch. Release the button to return to previous level.
- For instant Strobe output - at any output level (even) off), double press and hold the BLACK button switch. Release the button to return to previous level (or off).
- The optional switch button located at the tailcap is treated as the secondary BLACK switch button.


Battery charging9:
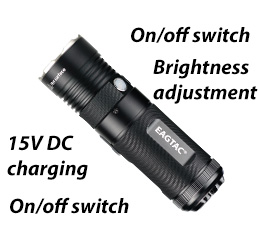
- Remove the waterproof cover and insert the charging connector to charge the battery. The flashlight will switch off the LED output during charge automatically.
- When charging is finished, unplug the charging connector and restart the flashlight.
Controls

Other features
- LED direct soldering on copper for maximum heatsink ability
- User replaceable rechargeable li-ion battery pack
- User replaceable glass lens
- Battery reverse polarity protection
- Ultra low internal resistance phosphor bronze springs (silver coated)
- Spring loaded positive and negative terminal
- Built-in li-ion charger
- Tail stand
- Tail-cap with on/off switch
Warranty
- Ten years performance guaranteed warranty
- Read flashlight regular maintenance
Battery Safety Precaution
Ensure the protective circuit on the 18650 batteries has current limitation of higher than 8A. Always use proven EAGTAC batteries for best performance and reliability.All EAGTAC flashlights are designed to use button-top battery (battery with protruding positive terminal). For rechargeable li-ion battery, use only EAGTAC li-ion battery, or other protected li-ion battery with compatible length and diameter. Before using the battery, check and ensure the battery outer wrapping (the isolating plastic film that wraps around the metal housing of the battery) is complete. Broken battery wrapping may lead to short circuit and damage to the flashlight.
Lithium and Li-ion battery can explode or cause burns if disassembled, shorted, or exposed to high temperature. Do not mix new and used batteries. Do not mix batteries with different brand, capacity, voltage, or install batteries backwards.
NiMH rechargeable battery may release gas during discharge. If you experience an inflated switch boot or find high pressure being built inside the flashlight, switch off the flashlight immediately. Slowly loosen the tail-cap to reduce the internal pressure and replace all batteries. Back to top
Flashlight Maintenance
Periodically clean the threads and o-rings with a lint free cloth and apply a thin coating of EAGTAC synthetic grease to the o-rings and threads. After prolonged exposure to moisture, the head and batteries should be removed, inspected, and dried. Do not touch or attempt to clean the reflector, as it will scratch the reflective coating permanently. Back to top- Battery included
- All batteries must have protruding top button.
- Beam output diameter taken at one meter
- ANSI FL-1 Lumens is a measurement of light output standardized by American National Standards Institute for use with flashlights. This ANSI Lumen measurement is the total overall light output being emitted from the flashlight. This measurement is generally more accurate as it takes into consideration the loss from reflector/lens/bezel. EAGTAC’s ANSI Lumen output is measured with flashlight cold start-up using a calibrated integrated sphere.
- After 60 seconds at maximum output level (100%), this feature activates and continuously adjusts the maximum output level according to the flashlight internal tempearture. The adjustment output range is between 68% to 100% and this feature maintains the flashlight surface temperature to be about 140°F (60 °C) or lower depending on surrounding temperature. It's normal for high power flashlight to run hot at MAX level. Reduce the output if the user finds the flashlight too warm to hold.
- Runtime is measured using three EAGTAC 3500mAh high discharge 18650 li-ion batteries. With active thermal management feature, runtime in cooler environment will have shorter runtime (higher MAX output) and long runtime in hotter environment (lower MAX output).
- Maximum efficiency occurs when input voltage is very close to LED forward voltage.
- At 100% output level, it is possible for the LED indicator to flash three times with freshly charged battery. This is normal as the input current draw from a cold startup flashlight is very high (higher input draw from battery = lower underload battery voltage).
- The charging board requires the battery to be lower than 12V in order to start charging. User can force the flashlight to charge without this constraint by turning on the flashlight at MAX output (charging circuit will read lower underload voltage).
- Details and feature maybe subject to change without notice.